So I won't deny it, I have been all over the map these past few weeks BUT...I have some very exciting news to share next week because of it. Sometimes it is just so hard to keep a secret!
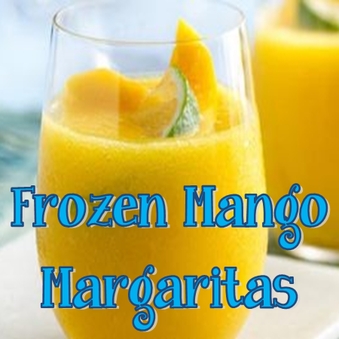
While I am holding off until Monday for the big reveal I thought I would share with you a fun end of summer (tear...) recipe that will be sure to satisfy your taste buds this weekend. Ever since I first tried these at my friends house a few summers ago this has become my favorite go-to recipe. Southern Living can do no wrong! Enjoy!
Frozen Mango Margaritas(Makes about 10 cups)
Ingredients- 1 - 20oz jar refrigerated sliced mangoes
- 1 - 6oz can frozen limeade concentrate, thawed
- 1 cup tequila
- 1/2 cup orange liqueur
- colored decorator sugar (optional)
Instructions- For an extra bit of sparkle to your glass spoon 3 Tbsp. juice from mangoes into a shallow dish, dip rims of glasses into the juice and then dip them into the sugar crystals to coat.
- Take the rest of the juice and the mangoes and pour them into your blender with the limeade concentrate, tequila and orange liqueur. Blend all the ingredients until smooth making sure to stop and scrape down the sides periodically.
- Once fully blended pour half of the mixture into a separate glass and put to the side.
- Add ice to the remaining mango mixture in the blender and blend until slushy. Again, you might need to stop and scrape down the sides to get it fully blended.
- Pour your mango margs into your dazzling glasses and then repeat the ice adding process with the remaining mango mixture so you have your second batch ready to go! (And believe me you will want that second batch ready to go ASAP!)
**Additional fruit or garnishes optional but thoroughly enjoyed if provided!
I hope everyone has a wonderful weekend and be on the look out as I might share a hint or two this weekend about my fun announcement on Monday! :)
xoxo
Megan
You might also like these summertime favorites...
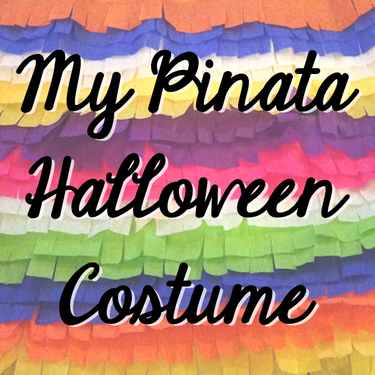
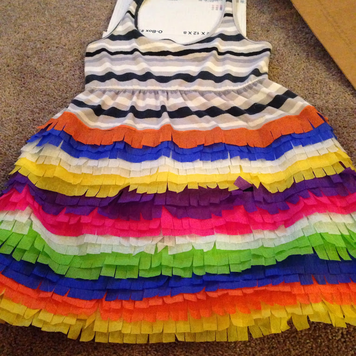
Happy Monday! As promised today I have my step-by-step tutorial on how I created my pinata Halloween costume that I wore this year. About a week or two before Halloween I spent hours on Pinterest trying to find an idea for a costume. Being the crafter that I am I really wanted to make my costume instead of buying it. So when I came across a picture of a cute pinata dress I was determined to figure out how to make my own version of the costume. Here is how I made this year's Halloween costume creation...
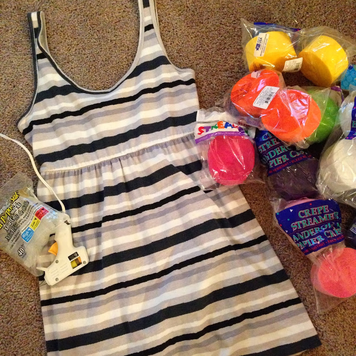
Here is what you will need:- 1 dress or slip (I bought mine from the local Goodwill store for $4)
- 6 to 8 rolls of streamers (I bought all of mine for $1 at the Dollar Store)
- hot glue gun & glue sticks
- scissors
- large piece of cardboard
Instructions:
1. Before I began my project I had to hem the dress to the length that I wanted the dress to be. I used no-sew hemming tape and an iron and had my dress ready to go in about 5-10 minutes.
2. Once I had my dress at the correct length I cut my streamers so that each piece would wrap all the way around the dress one time each. To prevent the streamers from ripping I didn't cut the slits in each streamer piece until I was ready to glue it onto the dress.
3. When you are ready to glue on your first streamer take a piece of cardboard and stretch the dress over it. This will prevent the dress from sticking to itself on the inside.
4. Starting from the bottom of the dress and working up, glue your strips of streamers onto the dress using the hot glue gun. In no organized order I glued two strips of each color onto the dress at a time. It was just an added perk that the dress I found was striped and provided excellent guidelines.
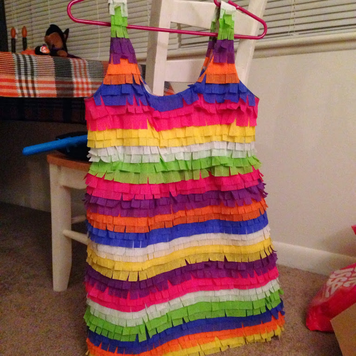
5. To help prevent an visible seam I started and ended each streamer in the middle on the back.
6. When I got up to the arms and dress collar I glued on the streamers like normal and then folded over any extras and glued it to the inside of the dress.
7. As a final touch I added a pinata tail by cutting 1 long strip of each color, tied them together and then glued it to the back of the dress.
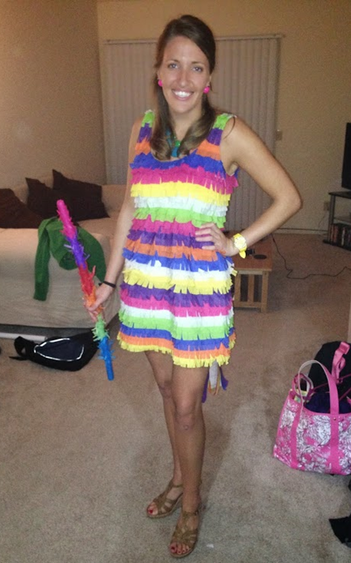
To finish the look I wore bright colored jewelry, carried a pinata stick and had a purse filled with candy to hand out at the party. This was such a fun costume to wear! Everyone I saw that night loved my costume and could not believe that I had made it. (Handing out candy also helped a little too!) My only worry with this costume was that all the streamers were going to fall off after once use, so it was a great surprise when I got home that night and the costume was still in great shape.
What did you dress up as for Halloween? Did you try a DIY idea this year like I did?
xoxo
Megan
You might also like...
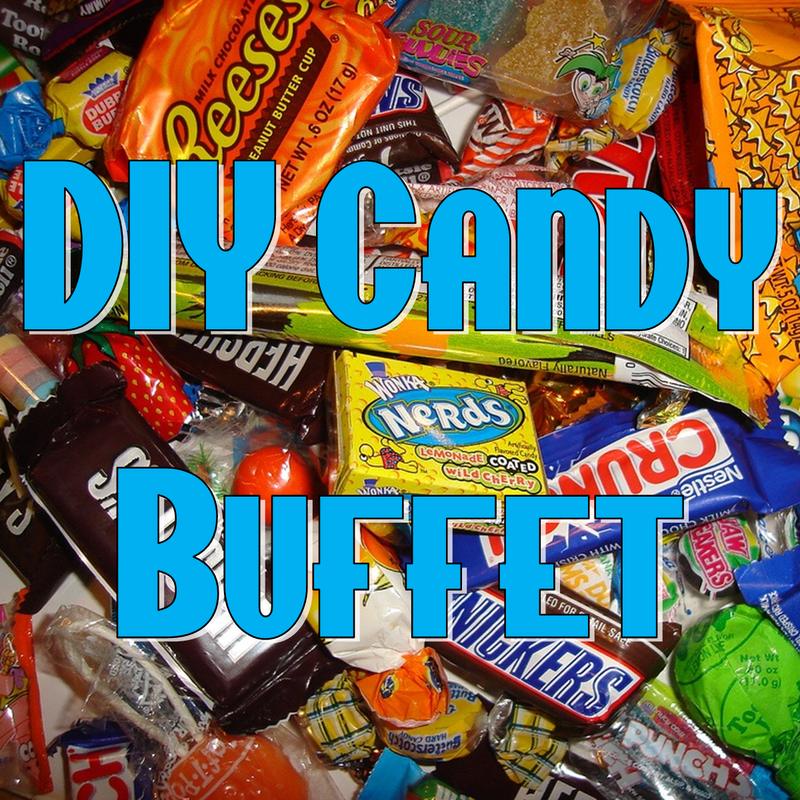
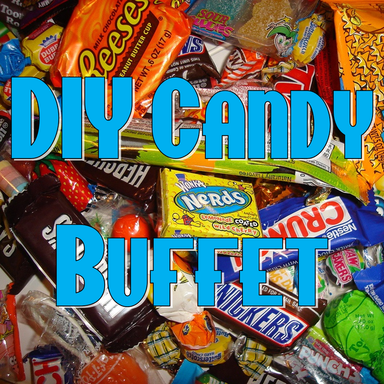
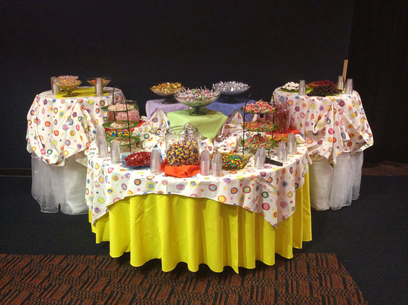
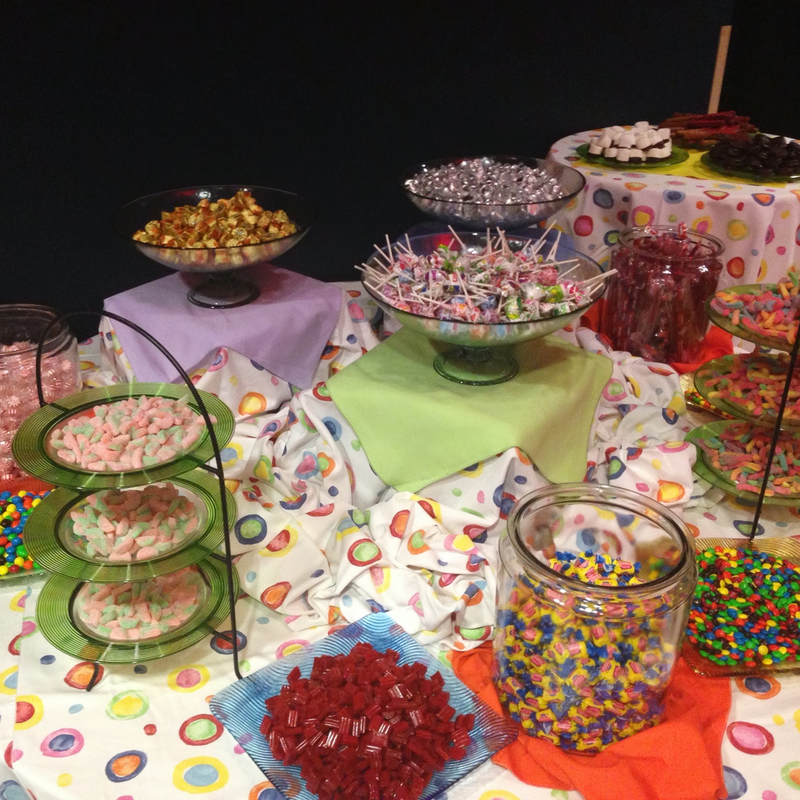
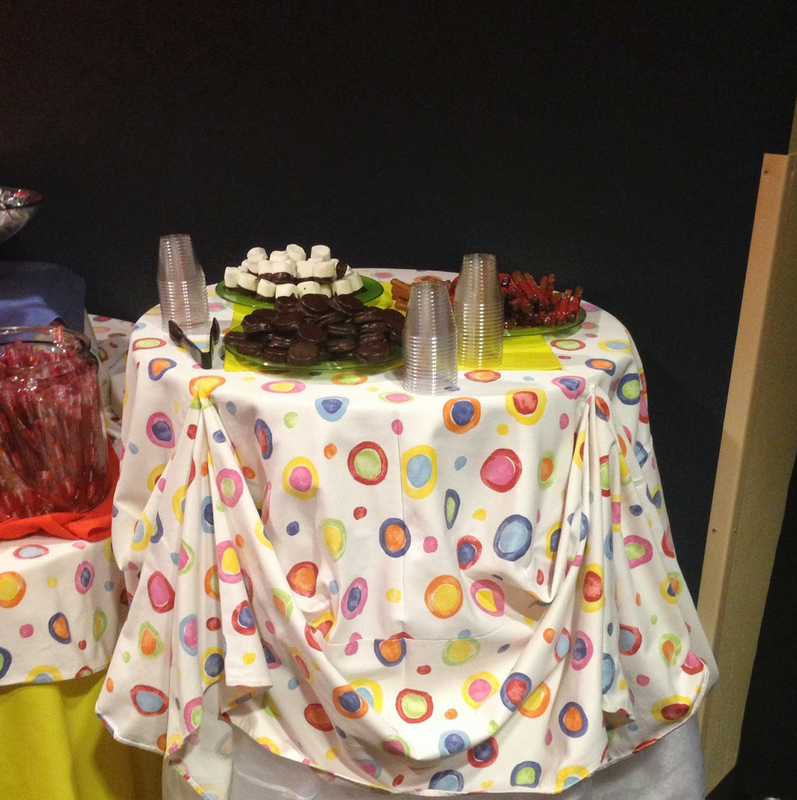
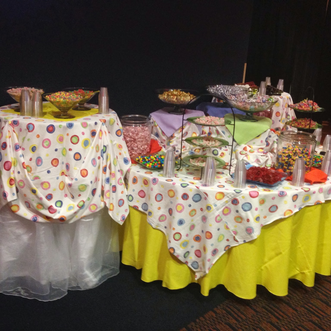
This past weekend I helped with a private function that featured a sweet tooth sampler. It was filled with chocolate covered treats, bowls filled with M&M's and enough sugary gummies to send any dentist running for the hills. Candy buffets are favorites to have at weddings, birthdays and just about any themed party. They are great to have as they provide a variety of treats that will surely satisfy every and you can coordinate your candy selections to fit any party theme. I think the candy buffets that are made up of candy all in one or two colors always look amazing. Here are some great tips on how to create your own amazing candy buffet.
1. Determine Your Budget. I strongly suggest setting a budget for your candy buffet prior to your shopping trip. Once you start selecting which kinds of candy you want at the store you will be surprised at how quickly it adds up. Specialty candies will be priced by the pound and can add up quickly.
2. Pick Your Theme. You can find candy in every shape, color and flavor these days. Choosing a theme before your shop will help you narrow down which candies to choose from. This candy buffet I helped create was filled with the host's favorite sweets.
3. Make Your Candy List. Just as I have said before it can get quite overwhelming when you start selecting candies for a candy buffet. Based off of your budget and how many guests you have attending create a list of the candies you want to make sure you have as well as a few alternate options. A great thing to consider with your candy selections are to include chocolates, hard candies, gummies, mints and gum.
4. Select a Variety of Display Containers. The best candy displays are created by using a variety of different sized jars and display containers. We used trays, vases, apothecary jars and bowls to put the candy in as well as tables of varying heights and crates covered in cloths to create this candy display.
5. Purchase Candy Scoops. Please make sure to have a variety of scoops, spoons, tongs, etc. available for your guests to use. Not all candies come wrapped up and you don't want your guests sticking their hands into the unwrapped candy.
6. Have Candy Bags/Boxes Available. If your event has kids attending a great way to help manage your candy supply it to provide favor bags or boxes for your guests to fill up. This will limit how much candy they can select and will help ensure that all your guests will be able to grab a few of their favorites.
I hope these tips help you in creating your own candy buffet! Here are some more great pictures from the one I helped create.
What type of candy would you have on your candy buffet? Happy Monday!!
xoxo
Megan
You might also like...
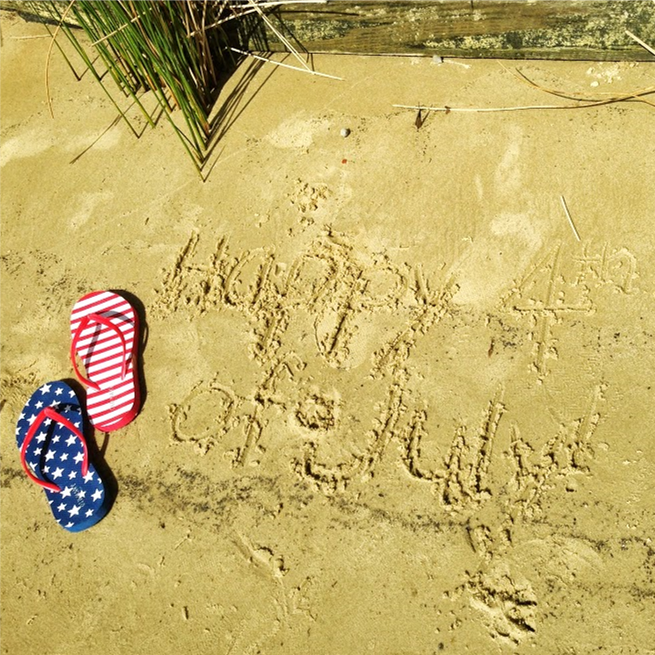
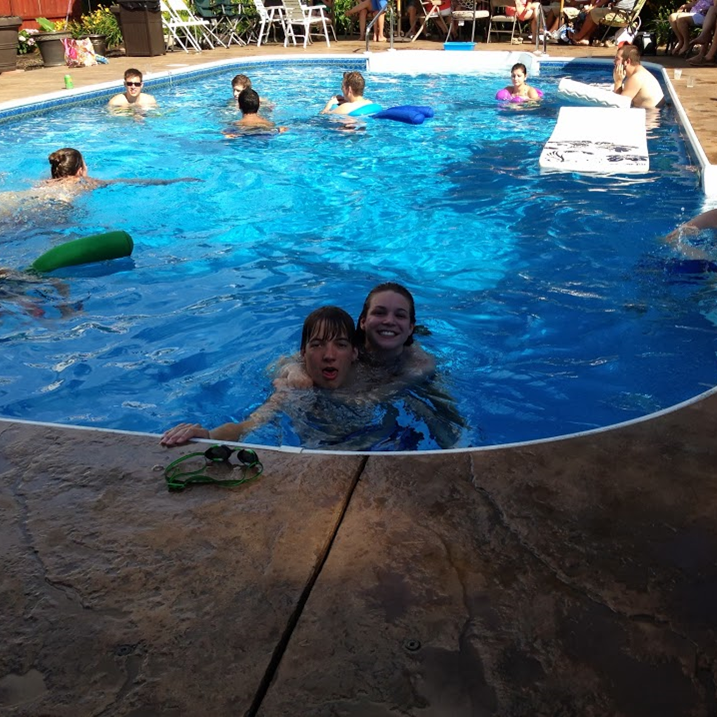
Well, I think I may finally have to admit that summer has come to an end. I had so much fun going down to the beach, hanging out with friends, celebrating the 4th down at the river and so much more! These past few weeks I have celebrated the end of summer with a fun trip down to the beach with the family (where we also
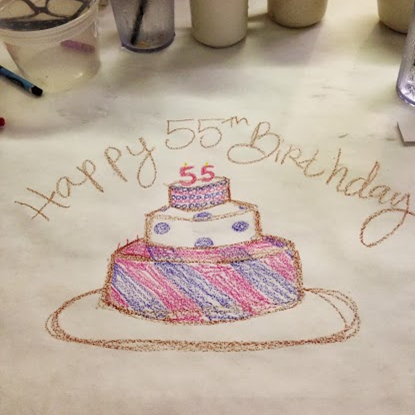
celebrated my dad’s 55th birthday!!), moved into a new apartment (which I am still decorating), tried out a new gym, headed back to the beach for Labor Day Weekend, enjoyed an amazing
girl’s night dinner, attended the grand opening celebration of the new Kate Spade store in town and had fun kicking off the 2013 football season! There really has been no time to rest! Even between all the events I made sure to capture some of my favorite moments the past few weeks to share with you.
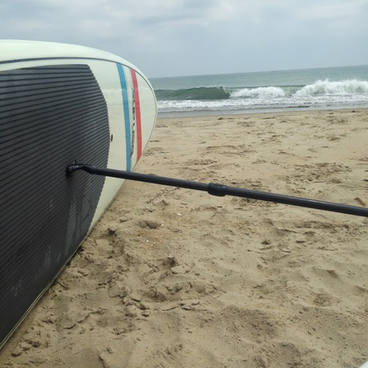
This is the main reason that I love going to the beach...to paddleboard!
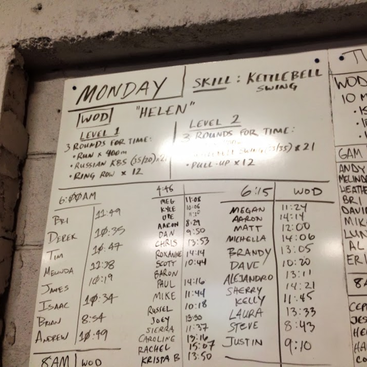
After I came back from the beach I tried out a week of
CrossFit. It kicked my butt, but I loved the workouts! Somehow I made it through each day's workout. Have you tried CrossFit before?
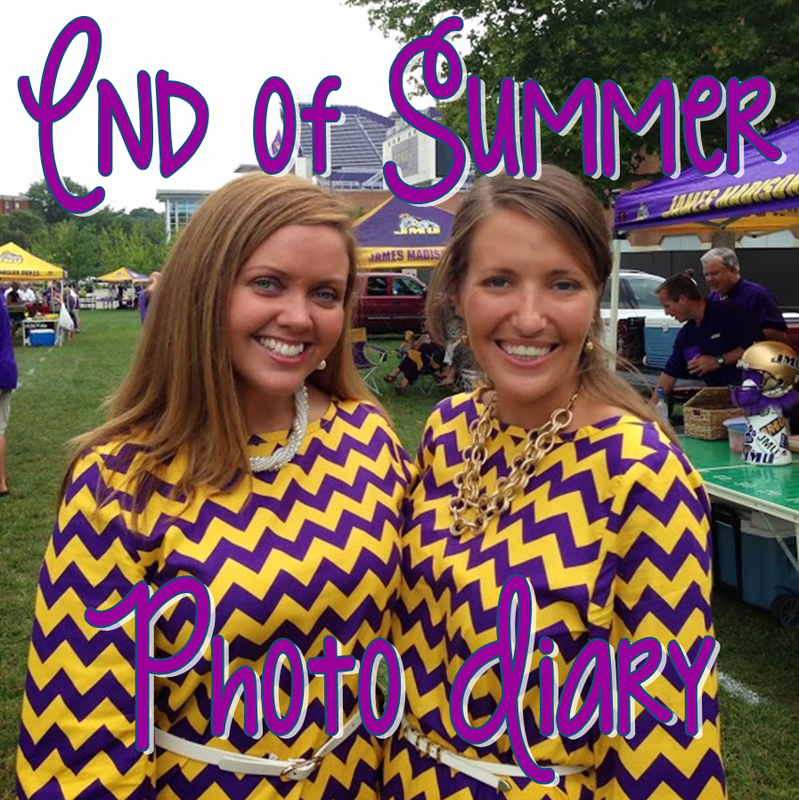
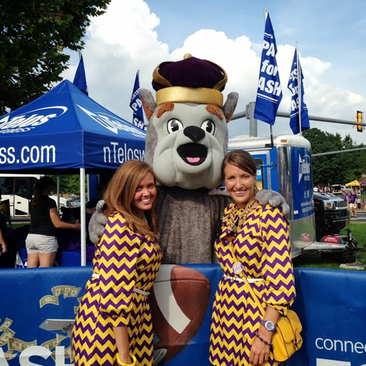
Labor Day Weekend means the start to football season! Of course we had to coordinate our outfits for the first game (thank you
LollyWollyDoodle!!) and get our yearly picture with Duke Dog.
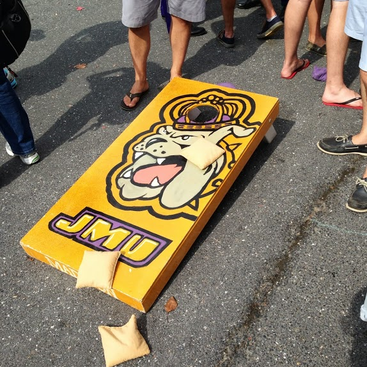
And what would tailgating be without custom cornhole with coordinating cornhole bags. You can get your own set of cornhole bags in your favorite team's colors from
Sam's Cornhole Bags and be ready for this weekend's tailgate!
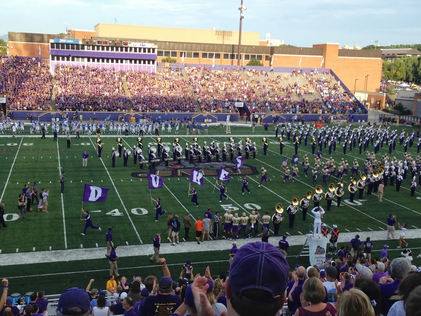
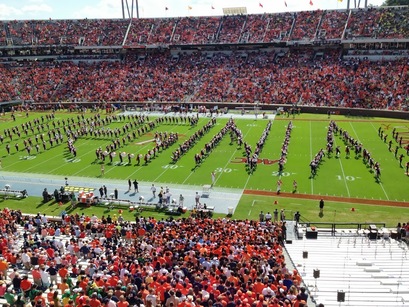
It's game time at Bridgeforth Stadium!! Let's go Dukes!
One last quick trip down to the beach over Labor Day Weekend. The weather was perfect and there were so many amazing shells that we found!
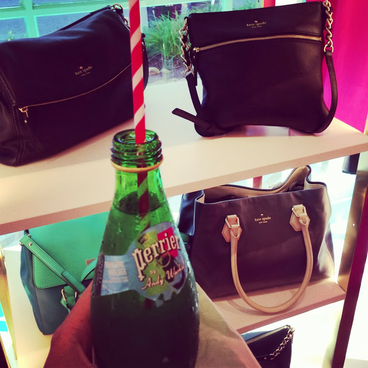
Attended the grand-opening celebration at the Charlottesville
Kate Spade store hosted by
InStyle. There were so many cute bags to look at!! I think I may have fell in love with my next bag.
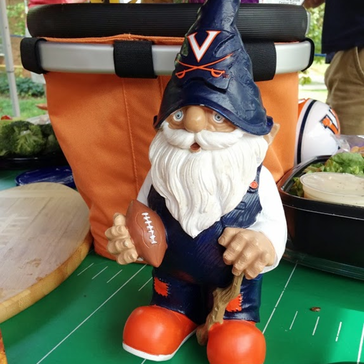
Week two of college football season...every tailgate has to have some fun decorations!
And it's gametime for the Virginia Cavaliers as they played Oregon.
These past few weeks have been so much fun and I will really miss the summertime weather. However, the event season is starting up this week and I have so much to look forward to this fall! I cannot wait to see what is in store for me next! What have you been up to this last month?
xoxo
Megan
You might also like…
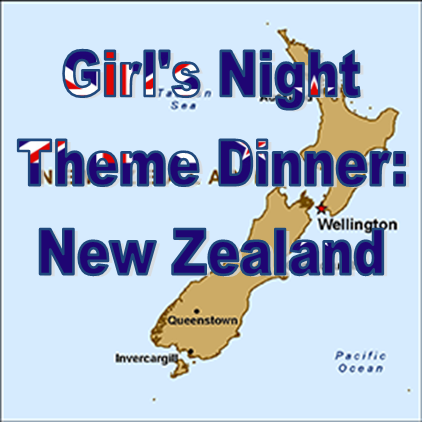
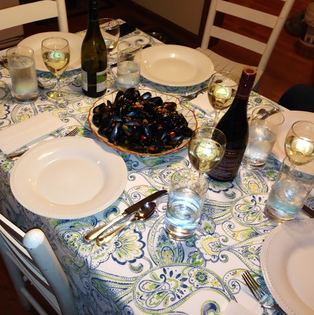
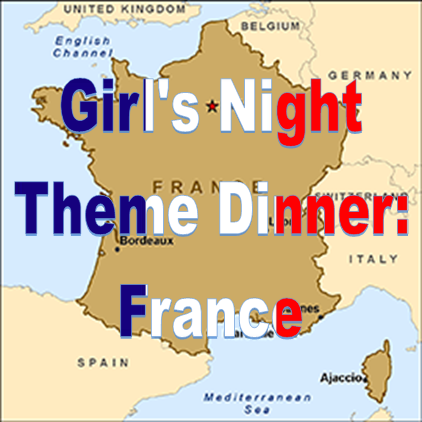
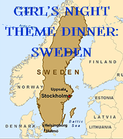
Happy Monday! Last week the girls and I got together for our girl's night dinner after taking the summer of and had so much fun coming up with our down under themed menu. So with dishes in hand we all headed over to my friend Emily's house and prepared ourselves for a delicious 5 course meal (more or less because we didn't have anything actually ready at the same time) along with some great New Zealand red and white wine. Here was our menu for the evening along with the recipes so you can host your own New Zealand themed dinner.
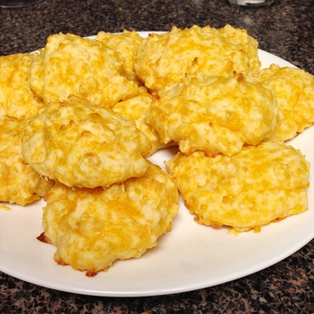
Course One: Down Under Cheese PuffsI made this dish and besides how easy they are to make they also disappeared so quickly that I barely had time to take a picture of them before they were gone! I also made a second batch this past weekend and found out that they reheat wonderfully in the toaster oven. Here is the recipe I used to make the
down under cheese puffs.
Course Two: Marinated MusselsBesides the yummy mussels, that we all dove right into, you can check out our beautifully set dinner table (first time ever!). Most of us grew up enjoying freshly caught seafood so this was a 5-star dish in our books! Here is the recipe on how to create the
marinade for the mussels.
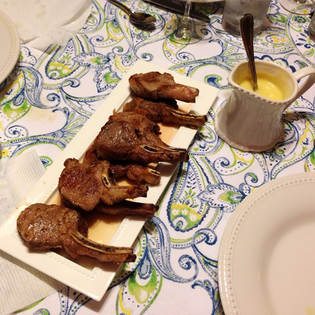
Course Three: Lamb Chops with White Wine SauceSome of us may have been licking the sauce up after we ate all our lamb. But no worries, we really did enjoy the lamb too! The lamb was cooked in a frying pan with a hint of olive oil, once crisped on the outside the pan was put into the oven until done. And here is Emily's recipe she used to make the sauce:
- 1 1/2 cups white wine (I used Chardonnay)
- 1/2 cup lemon juice
- 1-2 shallots, diced
- any herbs you might want, although I couldn't taste what I put in there.
- 1 tablespoon heavy cream
- 12 tablespoons butter (1.5 sticks) cubed and COLD
Heat everything but the butter and cream in a saucepan over high heat. Boil until reduced to about two tablespoons. (She strained off the shallots at this point, but it's not necessary). Add cream and reduce to low. Add the butter 2-3 cubes at a time, whisking the whole time until it is all mixed in.
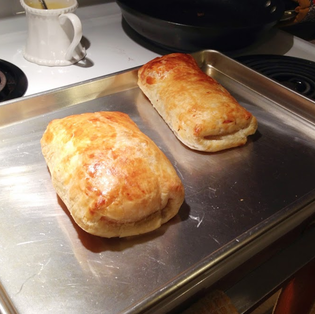
Course Four: Sausage RollThis was another simple recipe on our New Zealand menu as it is basically sausage rolled up in a pastry puff. Instead of the individual rolls like this
sausage roll recipe called for, two larger rolls were made. The only downside to this was that the rolls took forever to cook. (oops!) Once it finally cooked it was beyond delicious and there wasn't much left even after we had already had three other courses!
Course Five: PavlovaThis delicious New Zealand dessert specialty was completely homemade (except for the strawberries) and tasted so light and fluffy! Here is a great
pavlova recipe from Martha Stewart you can use to make your own. However, you can also add a graham cracker crust to the base as well as top your dessert with any kind of fruit that you like. Somehow after four other courses we all managed to enjoy a nice slice of this heavenly meringue dish.
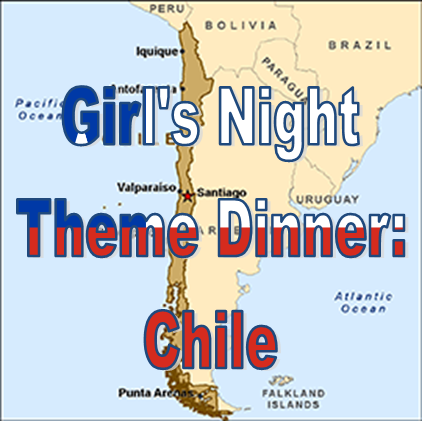
By the end of the fifth course there was not an empty stomach in the house! We officially declared the meal the best girl's night dinner menu ever. Next month we are heading south to Chile!
Do you have any suggestions on a good recipe for me to try?xoxo
Megan
You might also like...
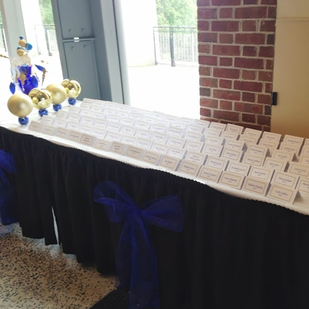
A lot of event hosts are looking for new ways to add personal touches and decorate without breaking the bank. With the rise of Pinterest there is no end to the amount of wedding inspiration that you can find. A few weeks ago I worked a wedding in Charlottesville where the Mother of the Bride went all out with the DIY decorations. They turned a great event venue into an amazing reception venue with some simple projects that I could not wait to share with you. Here are some of my favorites from the event.
The place card and gift table showcased a multitude of DIY projects. Besides making their own place cards for all the guests they added decorative bows to the table skirting as well as put together the blue and gold globes you can see lined up. They used small circle vases stuffed with metallic streamers and added a large gold ornament on top. This is a budget friendly easy DIY as you can find everything for the project at your local dollar store. Over on the gift table side they took a large blue vase and then suspended blue and gold decorative ornaments from gold wire. It was quite pretty to look at!
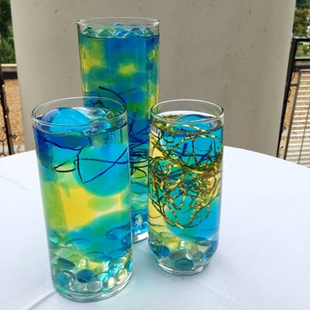
This cocktail table centerpiece really drew everyone's interest. These vases are filled with these things called magic growing jelly balls. They are little spheres that you submerge in water and watch them grow. They had blue, yellow and clear balls in two different sizes that they put inside vases with a battery operated tea light at the bottom. These jelly balls also work great in flower vases and other water displays.
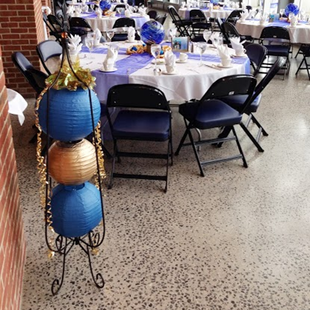
Instead of renting a dance floor, since there was already a nice terrazzo floor, they decided to create floor markers for the 4 corners. A paper lantern column was created for this purpose. Paper lanterns were strung together with hanging lights inside. Metallic gold ribbon was then attached to the top lantern with everything being hung from the metal tower. This was an elegant way to designating where the dance floor was for their guests.
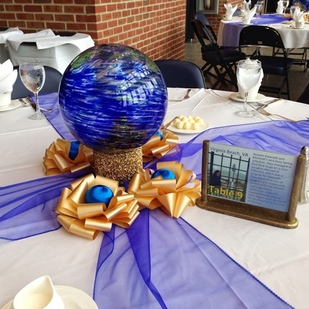
The last DIY project I wanted to share with you today were the table decorations. They used two table runners, bows, ornaments, battery operated lights and outdoor glass globes. The fabric table runners were layered to form an "X" across the table with the glass globe and ribbons arranged over the crossed section. The table numbers were simple photo holders that were spray painted gold and had 5x7" photos inserted into the frame.
The best thing about these projects? You can alter the colors to match your own wedding theme! Do you have an easy DIY project that you have created for an event?
xoxo
Megan
You might also like...
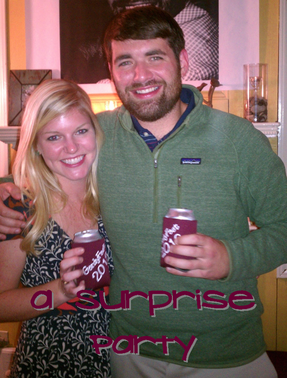
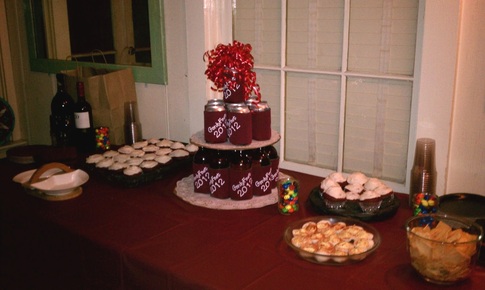
Happy Happy Monday to you all! I hope everyone had a good weekend and have rested up from all of last week’s Halloween fun. I know it was Halloween, but instead of attending Halloween festivities on Wednesday I celebrated one of my friend’s birthdays (he is a Halloween baby).
His girlfriend wanted to get all his friends together to celebrate and asked for some help with getting everything planned and put together. The birthday boy went to USC which gave us the event’s colors and the food selection was all his favorites. This included red velvet cupcakes (USC colors of course!), pizza rolls, peanut M&M’s, chicken nuggets, cheese puffs, and a few other finger foods.
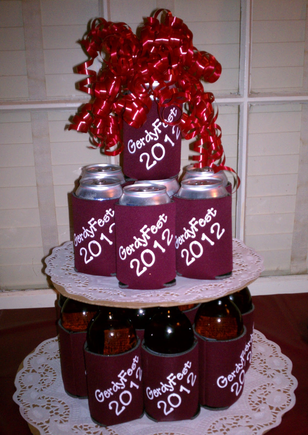
The best creation was the beer cake using the birthday boy’s favorite beers and custom made koozies that were made just for the occasion by etsy store owner
BarraKoozie. The birthday boy is never without a koozie so he loved every part of the cake!
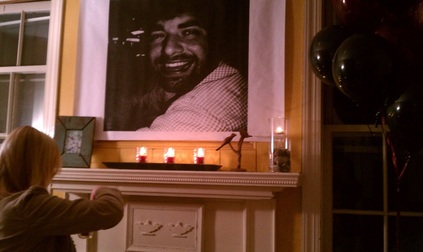
To add some humor to the décor, his girlfriend thought it was be hysterical to blow up pictures of the birthday boy to create fun birthday posters. You can get posters like these made the same day at Kinko’s on basic printing paper without spending a lot.
As with any successful surprise party the best part was that the birthday boy had no idea about the party! Everyone had a great time celebrating their friend’s birthday and it made for a perfect event evening! Have you had a surprise party planned for you before? What would be your must-haves when planning a surprise party?
xoxo
Megan
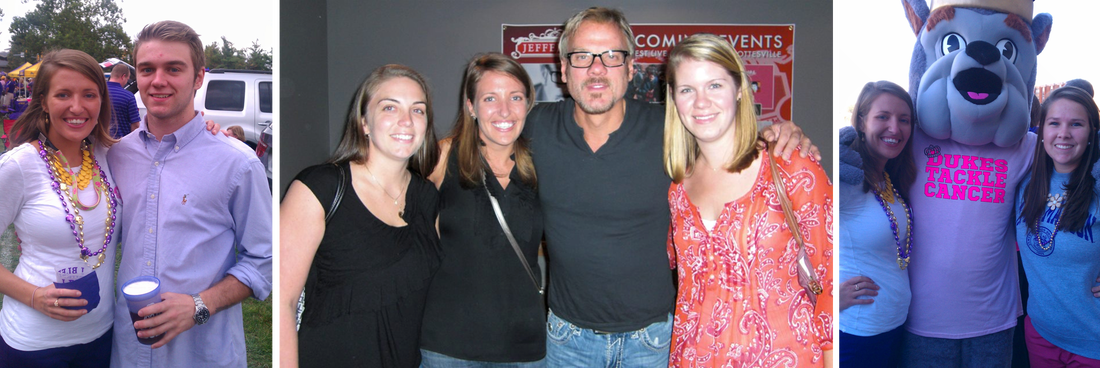
Happy Monday! So this past weekend was filled with activities. First I went to the Phil Vassar concert on Friday, JMU game on Saturday and then planned a fun mother/daughter day on Sunday. Here are some pictures from the JMU game and Phil Vassar concert. It's always a fun time when you get a picture with the school mascot.
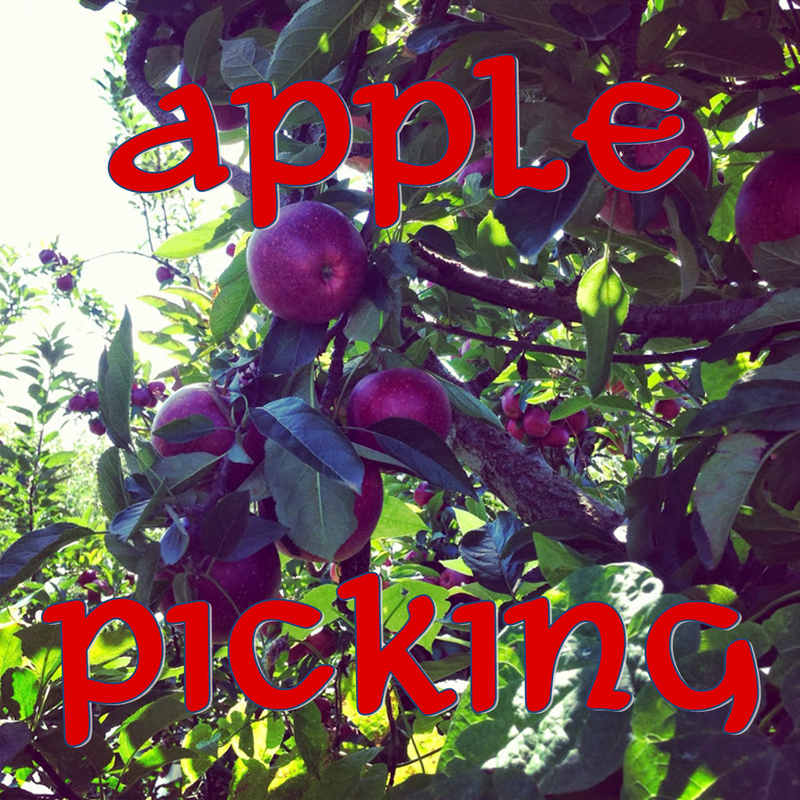
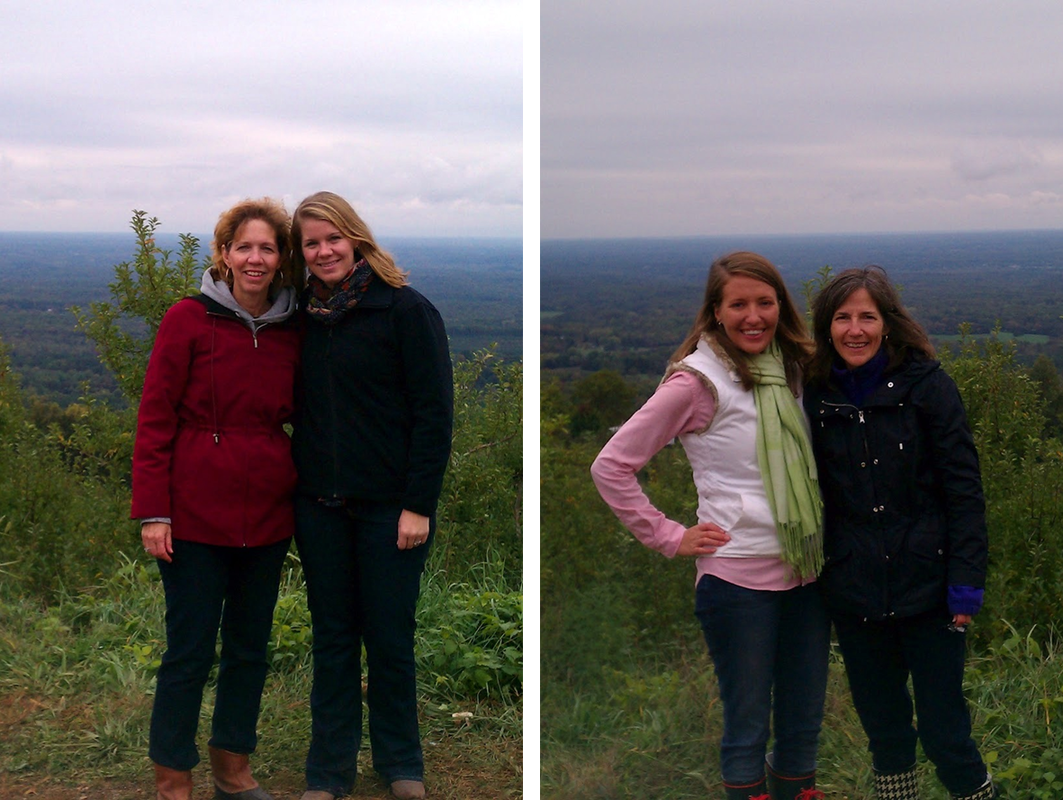
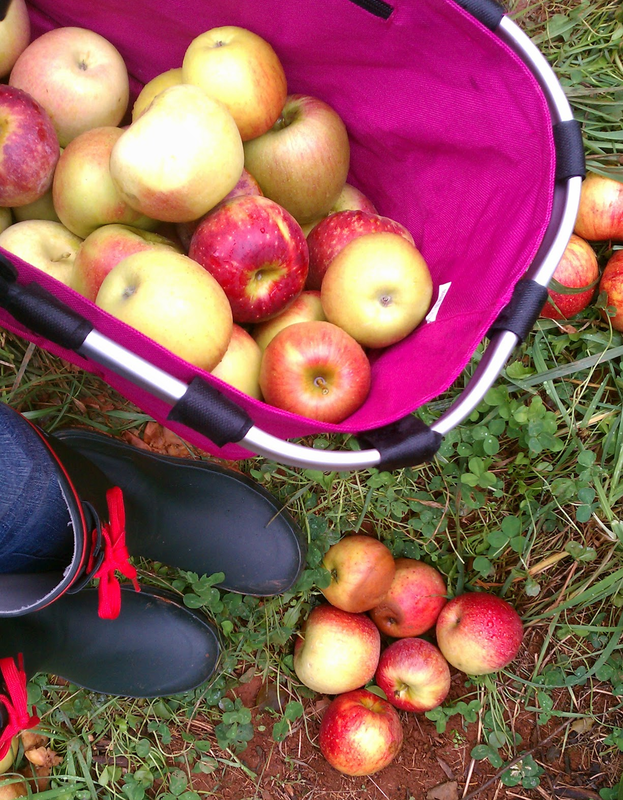
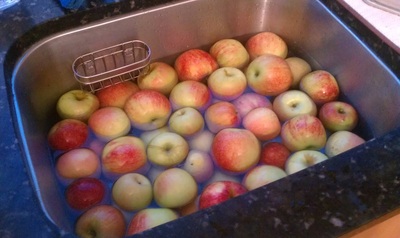
For the mother/daughter day of fun my mom, my BFF Emily and her mom all met in Charlottesville for brunch and apple picking at Carter Mountain Orchard. All four of us had so much fun at the orchard and it was the perfect time to go as it wasn't too crowded and the weather was perfect for apple picking. We each came away with so many apples, some amazing apple cider donuts and some delicious apple cider to drink.
Even though another weekend has pasted I had so much fun with everyone. I even got to check off 2 more items on my list of must attend fall events. Now all I have to figure out is what to do with all these apples I picked yesterday. So far I have added some apples to chicken salad and made apple bread. I think I may need an apple themed event menu so that I can use up all these apples! Any suggestions on what to do with all these apples that I currently have sitting in my kitchen? Send any recipes that include apples in them my way!! What did you do this past weekend?
xoxo
Megan
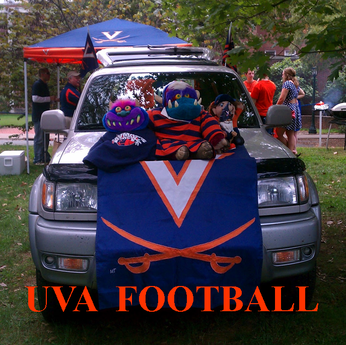
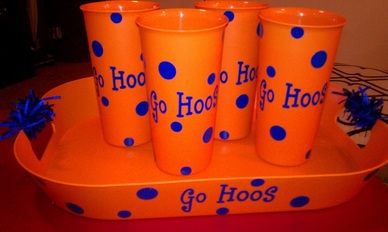
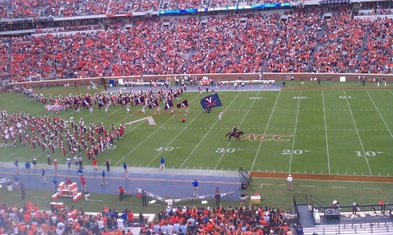
Just as each family has their own traditions, so does each school. This past weekend I attended my very first tailgate and football game at the University of Virginia (and got to check off another one of my 10 fall must attend events in Charlottesville ). My uncle attended UVA for school and is a religious attendee of UVA home games and invited me to go with him this past weekend.
Being the experienced tailgater that I am, my first thought was of what do I need to bring? So, as a little thank you and to contribute some UVA school spirit I made so great tailgate accessories that my uncle can use for his next tailgate. I made these adorable cups and platter all decked out in UVA colors using vinyl decals that I ordered from etsy shop We Speak Vinyl and ribbon. Customizing anything with vinyl decals, like the platter and cups, can turn anything into a wonderful thank you present for any event host. After the tailgate we wandered into the stadium to watch the game. I have been hearing about the pregame “Cav Man” ritual and couldn’t wait to find out what that was. Each week before the game starts UVA Video Services puts together a cartoon episode that is shown on their video board. It shows Cav Man up against the other team’s mascot in some fun scenario with Cav Man winning and then ridding to the stadium. At the end of the clip it has him riding up to the stadium and then a real Cav Man come galloping in on his horse into the football stadium leading the team out onto the field.
I love being able to watch what each team’s home traditions are for football games, and UVA is not one to disappoint. What kind of pre-game tradition does your school have?
xoxo
Megan


 RSS Feed